Instructions and hints
Step One: Print a Design onto a sheet of A4 or Letter paper

- Select a layout from the list of designs.
- Take a blank sheet of A4 or Letter paper. If you can, choose a high GSM paper for a nicer finish.
- When printing, MAKE SURE PAGE SCALING IS SET TO "NONE"! Otherwise, the fold won't
work properly. It doesn't matter if your printer can't print right up to the edges of the sheet - it will still look beautiful when folded up.
- Leave the printed sheet to dry for a few minutes, unless you're really impatient, in which case be careful not to smudge the ink!
Step Two: Write your letter

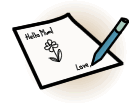
- Write your letter on the unprinted side of the letter. Use a ballpoint pen if you have thin paper - it shows through the other side less.
- Be creative! Doodle, and don't worry about keeping your writing in straight lines. Wild letters are much more fun to read.
Step Three: Address the letter

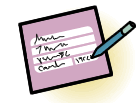
- Write the address of the person you're sending the letter to on the letter before you fold it.
- Write your own address on the reverse so that the letter can be sent back to you if it doesn't make it to your recipient.
Step Four: Fold the letter

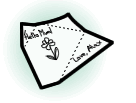
- Fold the letter up as per the instructions on the printed side. All of the folds are "mountain" folds (i.e. they all cover up the written side of the letter) with the exception of fold five, which is a "valley" fold.
- For the best effect, you should perform all of the folds on a flat surface with the printed side downwards. Curl back the letter until the guidemark you are folding to becomes visible. Flatten out each fold with the back of a fingernail or a teaspoon.
Step Five: Stamp and Send!

- Place a stamp across the diagonal edge on the front of the letter to help hold it closed.
- Drop the letter in any letterbox! If you're on a university campus and you can't find a letterbox, many receptions will accept mail that will be put in the post at the end of the day...
- Optionally, if you want to be sure the letter is secure (and especially if you are enclosing something), you can cut the edge of the final flap and glue it down with with a glue stick.

